Posts

Top 3 Programs for Working with Captions

Image
This is a special guest post, written by Ben Jacklin . Ben is an experienced writer and technology enthusiast with a passion for the digital world. He holds media and music technology qualifications and has become a respected name in the software and tutorial review industry. These days, captions are becoming increasingly important for modern media content. Captions help to make video content more accessible by providing subtitles and helping to make media understandable for people with hearing disabilities. As working with captions can be a tricky process, the right programs are essential for creating and managing captions effectively. In this article, we'll explore the top 3 programs for working with captions. We'll look at their features, how they can help you work with captions more efficiently, and which program is right for you.  Whether you're creating video content for a client or simply managing your own media library, having a go-to program for caption work can be
Creating Open Captions - An Update

Image
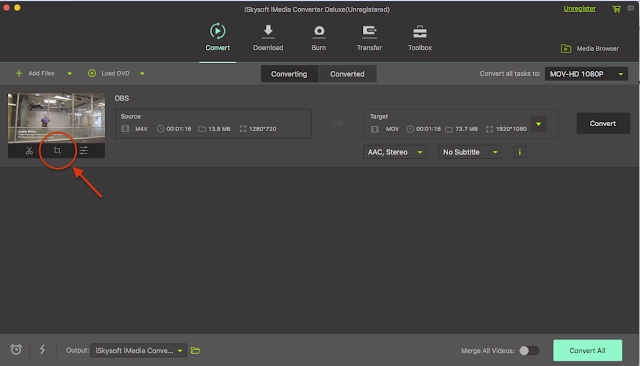
Previously I wrote about how to make what are known as "open captions", that is, captions that are always on and cannot be turned off like closed captions. The process I mentioned was that you would export from MovieCaptioner as an Embedded QuickTime movie, then open that movie in QuickTime Pro and export as a new movie. What this would do is combine the separate text track with the video track so it can't be ignored. If the text track is separate, when you upload it to YouTube or  some other site, the text track would be ignored and you'd just get the movie and no captions. Unfortunately, although it still works if you currently own QuickTime Pro, Apple has decided in their infinite wisdom to stop selling QuickTime Pro for whatever reason. Since then I've been searching for a replacement and I think I've finally found something. The software is called iSkysoft iMedia Converter Deluxe. It can take the SRT caption files that you export from MovieCaptioner

Adding Closed Captions to Facebook Movies

Image
Did you know that Facebook supports closed captioning? Here's how to do it. First, you will need to create your captions using MovieCaptioner or some other software. Export as SRT, the same caption format that YouTube uses. Once you have your caption file ready, upload your movie to Facebook by clicking the Add Photos/Video link on your status. Click the blue Post button. Your video will begin to upload. After your video is done uploading, you should get a "Processing" alert that will give you the option to Edit your movie. Click the Edit Video button. It will take you to this page where you can set the description, privacy, date, and other information associated with your video. If you didn't see the Processing alert, you can always click the Options menu on your video's page and select Edit this video from there. Scroll down to where it says Captions on the Edit page. Note the naming convention you'll need to use for your SRT file

Extracting QT Text Tracks From Movies to Create Different Caption Formats

Image
Do you have a QuickTime movie that has a text track, but you need to somehow get the captions out to create another format, such as SRT for YouTube or SCC for broadcast TV or iOS devices? Today's your lucky day. I'll show you how easy it is to repurpose QT Text tracks from movies. First of all, you'll need QuickTime Pro, which is a $30 upgrade to the QuickTime 7 Player from Apple. Open your movie that has the text tracks in it and go to the Window menu and select Show Movie Properties. In the Movie Properties window, select your text track (this one has 2 - one is French and one is English) and then click the Extract button. It will extract the text track into a new movie. Kind of weird to have a movie that is nothing but text, but that's okay. Now we're going to export this movie from QuickTime Pro. Choose Text to Text from the pulldown menu. I've named the new file "french.txt". Once it exports, you'll h

How to Add Captions to YouTube Videos

Image
It's really simple to add captions to your YouTube videos. If you're using MovieCaptioner , just use the YouTube export option... This will create a text file with a ".srt" file extension, which you would upload to YouTube after you've uploaded your movie. Just click the CC button under your movie... Then choose Add new subtitles or CC ... Select Upload a file ... Choose Subtitles file and find your SRT file that you exported from MovieCaptioner, then click Upload . After the SRT file uploads, you'll see the captions on the right-hand side of the screen. Just scroll to the bottom and click the Publish button and you're done. Pretty simple.  It will tell you your captions were published...  Now all you need to do is click the CC button on the playbar of your movie and enable your captions.  Please give MovieCaptioner a try. You can download a free, fully-functional demo that is good for 14 days from 

Closed Captioning - The Secret Edge to Marketing Your Video Content

As you may know, video can be a compelling way to advertise your product or get your message across to millions of people every day. But what you may not know is that by captioning your videos, all the content in your video becomes searchable, and that will give you a huge edge over your competition that may not have captioned their videos.  Closed captioning software has come a long way and it's now easier than ever to add captions to your videos. YouTube, Vimeo, and many others only require you to upload a single closed caption file to make your videos accessible to the deaf population. This will open up your market to a whole new audience. According to the World Federation of the Deaf, there are approximately 70 million deaf people in the world, certainly not a market to overlook. Not only does closed captioning make your content available to those who can't hear, but studies have shown that many hearing people learn better when closed captions are present in the video. It

Synchronizing Transcripts to Your Video the Easy Way

Image
Let's say you already have a text transcript of your movie and you need to synchronize it. First you'll need to break them up into readable chunks if they aren't already. You'll put carriage returns in the break them into separate captions on each line. Something like 50-60 characters or so looks good usually. You can use your text editor's built-in character counters to get you in the ballpark. Once you have your transcript broken up line by line into captions, you're ready to synchronize it. Make sure it is a plain text file and it has a ".txt" file extension. Open MovieCaptioner and load your movie. You'll be asked to save your project right away after importing your movie. Then go to the Import menu and select Text in Line Form . This will tell MovieCaptioner to treat each separate line as a different caption. Once the transcript is imported, you'll see the Set Timecode button appear at the top of the interface (or access it v