Posts

Showing posts with the label MovieCaptioner

Adding Closed Captions to Facebook Movies

Image
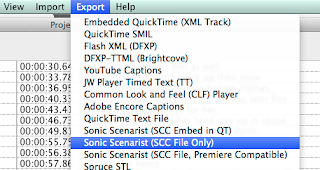
Did you know that Facebook supports closed captioning? Here's how to do it. First, you will need to create your captions using MovieCaptioner or some other software. Export as SRT, the same caption format that YouTube uses. Once you have your caption file ready, upload your movie to Facebook by clicking the Add Photos/Video link on your status. Click the blue Post button. Your video will begin to upload. After your video is done uploading, you should get a "Processing" alert that will give you the option to Edit your movie. Click the Edit Video button. It will take you to this page where you can set the description, privacy, date, and other information associated with your video. If you didn't see the Processing alert, you can always click the Options menu on your video's page and select Edit this video from there. Scroll down to where it says Captions on the Edit page. Note the naming convention you'll need to use for your SRT file...

How to Add Captions to YouTube Videos

Image
It's really simple to add captions to your YouTube videos. If you're using MovieCaptioner , just use the YouTube export option... This will create a text file with a ".srt" file extension, which you would upload to YouTube after you've uploaded your movie. Just click the CC button under your movie... Then choose Add new subtitles or CC ... Select Upload a file ... Choose Subtitles file and find your SRT file that you exported from MovieCaptioner, then click Upload . After the SRT file uploads, you'll see the captions on the right-hand side of the screen. Just scroll to the bottom and click the Publish button and you're done. Pretty simple.  It will tell you your captions were published...  Now all you need to do is click the CC button on the playbar of your movie and enable your captions.  Please give MovieCaptioner a try. You can download a free, fully-functional demo that is good for 14 days from ...

Synchronizing Transcripts to Your Video the Easy Way

Image
Let's say you already have a text transcript of your movie and you need to synchronize it. First you'll need to break them up into readable chunks if they aren't already. You'll put carriage returns in the break them into separate captions on each line. Something like 50-60 characters or so looks good usually. You can use your text editor's built-in character counters to get you in the ballpark. Once you have your transcript broken up line by line into captions, you're ready to synchronize it. Make sure it is a plain text file and it has a ".txt" file extension. Open MovieCaptioner and load your movie. You'll be asked to save your project right away after importing your movie. Then go to the Import menu and select Text in Line Form . This will tell MovieCaptioner to treat each separate line as a different caption. Once the transcript is imported, you'll see the Set Timecode button appear at the top of the interface (or access it v...

Using Compressor to add SCC Captions to Video for Broadcast TV

Image
Updated 5-20-18... An inexpensive way to add SCC captions to your video for broadcast TV is to use Apple's Compressor ($49.95 from the App Store). After creating your captions in MovieCaptioner , export your project as Sonic Scenarist (SCC File Only). This is the file you'll use along with your movie in Compressor.   Open Compressor, then go to to the File menu and select Add File and load your movie into the interface. Then in the Settings panel, select the proper preset that your station expects you to use. Most likely it will be something like MPEG-2 Program Stream, which you'll find under the MPEG Files dropdown menu. Just drag that preset onto the movie panel where it says Add Outputs and it should stick there. With the most recent version of Compressor (4.4), you will next see where it says Captions  right under your movie and to the right of that is a Set link. Click on that and find your SCC caption file on your computer.  It will have a .scc file ex...

How to Import CAP Caption Files into MovieCaptioner

Image
A reader recently asked if there was a way to import CAP files into MovieCaptioner. MovieCaptioner currently does not import CAP files directly, but there is a way, thanks to YouTube. As you may know, YouTube can import and display captions. What you may not know is that CAP files (with the .cap file extension) are one of the formats YouTube can accept. YouTube can also accept SRT (what MovieCaptioner uses for the YouTube caption export), SUB, SBV, and MPsub files. So, all you need to do is upload a movie to YouTube or use a movie you already have up there. It does not matter if it's the same movie that the CAP file goes to or how long the movie is. After you have a movie on YouTube, go to YouTube's Video Manager, check the box next to the video you want to edit, and use the pulldown menu next to your video to select Captions. This will take you to a new screen where you will choose your caption file to upload. Just click the Add New Track button and find your CAP file on...

Adding Captions to Windows Media Movies Using Microsoft Expresssion Encoder 4

Image
There are three different ways of adding captions to Windows Media movies: SAMI captions, Windows Media Encoder 9 (using WMP Text captions), and Microsoft Expression Encoder 4 (using SRT captions). Today we'll add them using Microsoft Expression Encoder 4 . One of the problems with using SAMI captions for Windows Media is that the caption file must always be linked to the movie, since it's separate from the movie. A better way is to actually embed the captions into the movie so they travel with it and are always available as long as the user has closed captioning turned on in their Windows Media Player. We're going to start by creating our captions in MovieCaptioner as we normally would. Make sure you create an MPEG-4 or .MOV version of your WMV file for use in MovieCaptioner as it's QuickTime-based. You'll still use your WMV movie for the final version, however. Instead of breaking up the captions using a forced line break as you might usually do, we're...